Create webframe package from blank
To develop a new type of user control that can be placed on an Integra webpage, you have the following alternatives
Create a webframe using the Microsoft's Visual Studio
Summary
In WordFrame Integra the webframes are uploaded to the system as .Net compatible source code, and the system will compile them on their first use. The installation process has two steps. First, you need to install your webframe package; second, you need to create webframes and place them on pages.
The WebFrame Package folder structure and files
The standard folder structure of the webframe package look like this:
- wfpack.info (the xml file with the pack meta details)
- wfpack.signature (the pack integrity signature and vendor public key)
- repository (the pack contents stored as .zip archive in the pack)
- my-files ( (optional) you can create your own folders to hold any files you may need)
- controls ( (optional) we often use such a folder to hold our controls we may need)
- control.ascx ((optional) the static control presentation template)
- control.ascxv.cs ((optional) the control's code behind file)
- WebFrame.ascx (the webframe's static presentation template)
- WebFrame.ascx.cs (the webframe's dynamic code behind)
- WebFrame.config (the webframe's configuration file and default values)
Description of the WebFrame pack files
wfpackage.info file
You can read more about this file on this location
wfpackage.signature file
You can read more about this file on this page
WebFrame.ascx
This is a standard ascx file which describes the presentation of the webframe's content. You can get plenty of examples from other already developed webframes, as the all are distributed open-sources under GPL v3 license.
In these files there is one important element that is specific and you should remember:
WebFrame.ascx.cs
This is the dynamic code behind file of the webframe. It will be later compiled by the platform upon its first usage. Here you can also refer to the installation path of the webframe with:
ctrlWebFrameSystemSettings.WebFrameHomeDirectory = "/" + webFrameRootPath;
WebFrame.config
This file holds the default and initial configurations and settings of the webframe. It look like the example below.
<?xml version="1.0" ?>
<webframe>
	<settings/>
	<ui-settings>
		<manage-form>
			<form-title>
				wf-blog-administration-title
			</form-title>
			<page-help>
        help_blogITBrix.Blog.Administration webframe management
      </page-help>
			<tip-box>
			</tip-box>
		</manage-form>
		<settings-form>
			<form-title>
				wf-blog-administration-title
			</form-title>
			<page-help>
        help_blogITBrix.Blog.Administration webframe specific settings
      </page-help>
			<tip-box>
			</tip-box>
		</settings-form>
	</ui-settings>
	<allowed-applications>
		<application>
			<software-id>3A5D627F-9041-46D0-BC5A-AD87B2E0E701</software-id>
		</application>
	</allowed-applications>
</webframe>
Build the new webframe package
To build the newly developed webframe package and sign it for distribution you need to use the Wordframe Integra packaging tool.
Create a webframe using the ITBrix.Core.CustomUserControl

There are two types of webframes that allow you to place you own code or scripts on any Integra web page - ITBrix.Core.CustomHTML and ITBrix.Core.CustomUserControl. The first one allows you to place custom HTML and javascripts. The second one allows you to develop on your favourite .net framework programming language - C# or VB, and provides a very easy way to really integrate with the platforms API even for the simplest tasks. To do that you need to follow these bullets:
- Install the ITBrix.Core.CustomUserControl webframe package by following the standard install procedure
- Create an instance of this webframe package again by following the standard creation procedure
- Navigate to the "Specific settings" of the webframe
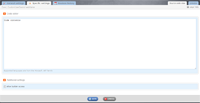
- Place your code in the "Code Editor" textarea
- Preview your code in action by clicking on the "preview" mini-tab in the upper right corner
- Press the Save button
This option should be used only for simple tasks, as it cannot be automatically supported, through the platform's automatic update procedure.