I am so glad to say that our first project is to build a home for the classical music community Chamber Musician Today. I am not a dedicated classical music fan, but I have my share of wonderful hours in the world of strings and brass. On the other hand, is there a better way to start something new or to welcome it in this world, than with classical music? "WordFrame Integra starts with classical music". Sounds really nice.
This build will be executed by Jerry Bowles and me, but we will like to invite everyone to provide thoughts and ideas. It is Jerry's wish to make the structure like in the current WordPress solution of sequenza21.com (which is in fact three separate systems emulating a single site  ).
).
1. Project wireframes
It is really important to do the concept wireframes before you start designing or developing a website, not only with Integra. This helps immensely to see and solve problems in the most efficient manner. A lot of very good ideas are also born on this stage of the project.
For this build, it is a little simpler as we have already good guidelines - ready and operational. Here are some snapshots of the current website pages.
-

Sequenza 21 home page
-

Sequenza 21 CD reviews
-

Sequenza 21 Calendar
2. Setting up the environment
This is very important for all of us being on the same page and play in tune. Find a classical music radio and let your neighbours know, you are building up a classical music community with WordFrame Integra. This is a prerequisite.
3. Setting up the web server
Currently we are happy partners of Rackspace, and especially their new service "Windows cloud servers". Still in beta and lacking some very handy functionality and a little slow in times, but nevertheless my company is happy using it. I am too.
WordFrame platform is integrated with the webserver on very low level. It can reboot its applications, compile code on the fly, monitor the hardware environment and totally update itself. This is why I prefer to use a separate server for each of our solutions. It is not mandatory, not even a bit, but I just think this is the professional way to do it. And this "professionalism" is not making my company's bank account go nuts, because of the newest cloud technologies and the mentioned service above.
Creating a new Windows server in the Rackspace cloud is a breeze. It takes me about 1 minute "hard" work and about 5 minutes of waiting. Before some time, I was even able to create 9 servers in five minutes. A dream come true.
After the server was ready, I established a remote connection and installed the required Windows components - IIS webserver, .NET 4.0 Framework and the MS SQL Express server. ("@Rackspace: Guys, please, windows server images, please"). Took me about 10 minutes to prepare the environment.
4. Installing the WordFrame Integra "Community blog" template
Integra Templates are very handy way of saving a lot of work, when you need a project started. The closest available one for the current project is the "Community blog". So I decided to stick with it.
I connected and logged remotely in the server and did the first thing I usually do - download and install Google Chrome browser  . I am not big fan of Chrome, but it has the quickest installation and the preinstalled IE6 on some of the servers, really, really suck (this is why Integra does not support it. You should not support things that suck). After my new and shiny Chrome knight was ready, I just browsed the wordframe.com site and downloaded the WordFrame Web Installer.
Installing the platform with the dedicated installer is very fast and error free process. It is very well covered in our installation guide. When you do it more than twice, as I have, it takes really not more than 3-4 minutes. There are only two specifics that need to be mentioned:
- once installed and browsed for the first time, the Integra platform needs about 2 minutes of time to finish its installation. This process is completely automatic, but leads to some strange webserver responses. My advice is just to browse the public site and the core administration links once and wait for about 2 minutes before you start working and browse them again.
- firewall exceptions - the most used installation method is to put at least one of the created websites (public and core admin) on a port different than the default 80. This will require to set up an exception rule in the Windows server firewall.
If everything was done correctly, I should be able to browse the Core administration and the public site, on the server's external IP by adding the TCP ports I have set in the Integra installation program. In my case it was something like http://173.203.64.11:2010/ for the public site and http://173.203.64.11:2011/ for the administration core. (the IP is just as an example). As many times happens, I received the "The connection has timed out" message in the browser. This meant I again forgot to set the firewall exceptions for the ports I was using (2010 and 2011). A mistake that I quickly fix by logging into the server again and performing the actions from step 21 of the installation guide. I will not forget some day, but clearly not today.
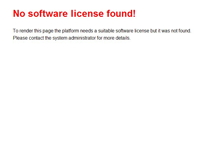
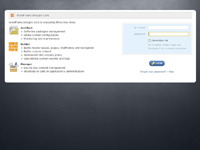
OK, I browsed again and received the following two screens, which cheered me up.
-

Public site
-

Core administration
The big red "No license" label may look scary, but now it only means that I haven't yet properly licensed my new platform installation. It is part from the Platform licensing process, which is done later, so it did not ruined my good mood. I logged in with the default account details username "architect" and password "architect", browsed a little just to see that everything jumps as high as I want it to jump and ... decided to have a little lunch. Grab yourself something and lets meet back in 15 minutes.
5. Post - install checklist
A lot of things look better on a full stomach, but this is not the case with WordFrame Integra. It looks always so good (dare I say else?  ).
).
Having my habit of always missing something, I have the post-install checklist opened and will follow it step by step. I browsed the Core administration. logged in with the default "architect / architect" account and started reading the checklist (having two screens helps):
- Change the administrative account details - I always change both the username and the password. Even the "Administrator" username of the windows server. A valuable lesson I learned from my colleague Hristo. My advice for you is to do it also. Always. By the way I learned also another valuable lesson from Hristo - Do not disable the network interface on a remote server, while you are remote managing it and it is physically far far far far away. As they say, learn from the best, to become one.
- Get the list of the latest software available -the server needs to be connected to Internet for this one. If this is a security issue for you, you need to provide a connection at least to the important wordframe system URLs such as the repositories and the license service. My server is online so I just hit the "synchronize" link and in a few seconds it was done. I have the latest software catalogue at my disposal.
- Update the installed packages - I have a favourite trick in each software I am using. In Integra, the software update is the one. 5 clicks with the mouse and I am ready. The system's software is completely updated, without anything going wrong. No more scripts or workarounds. And if I want to be lazy, it can do it for me - automatically. Those of you that support more than 50 websites, know exactly what I am talking about.
- Set backup plans - backup is very important. I find it much easier to set it up with the Integra backup schedule plans, than with the SQL maintenance plans. I usually set a daily backup and make the platform to keep the last 7 of them, so i did that again. Also I make a dedicated folder on the server and allow "Everyone" account to read and write in it. In this way I do not need to provide account username and password for the backup job to use. Have in mind that the password you provide here can be seen from another administrator of the Integra Core, so the best way is to do like me or to make a dedicated account for the purpose.
- Set automatic update plans - no need to say again how much I like this update functionality. My usual settings are - critical updates, daily at night, full system update once a week on Saturday night. The email alerts are enabled for both of them.
- Set the default domain settings - if you set your correct domain or IP during the installation, the domain settings will be OK. But it never hurts to double check. If in the web installer, you left the default "localhost" with the default ports "2010" and "2011", but now you are using the platform on the server's external IP, you need definitely to change the default domain settings. Replace in the URLs the word "localhost" with your server's external IP.
- Choose timezone and locale - Eastern Time (GMT-5) works for us (or at least I hope so
 )
)
- Set the SMTP server settings - currently, I do not know what SMTP server will Jerry use for the Sequenza 21, so i will leave this as it is. This means that no emails will be send from the platform. They will be scheduled, but fail. I can live with it. ( Jerry, you can help me out here )
- Submit an email for system alerts - the same story as the SMTP. Will know it in the next couple of days.
- Upload robots.txt and favicon files - time for some early SEO. I do not have right now the favicon, but for robots.txt I put the most simple one.
The platform is completely ready and installed. Took me about 2 hours (I was writing this post meanwhile). The average time that I complete this process is about 30 min. Not bad, ah? I decided to call the day off for the project.
Have ideas, problems or suggestions how to do this better? Come on and join the discussion with a comment.
Continue to Day 2 >>