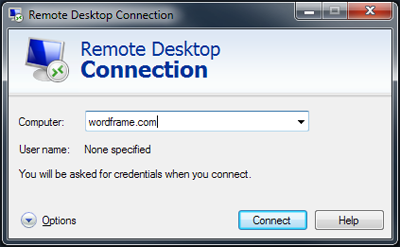
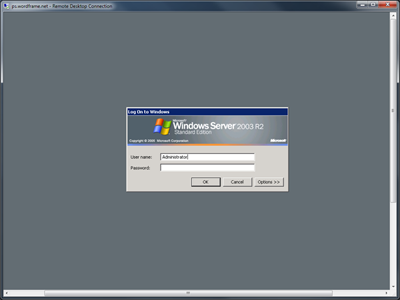
In order to install Integra on a remote server, you need to remotely administer it. Remote connections with Windows servers are by default established using a RDP client. I will present here a step by step guide how to do it with the most used one Microsoft "Remote Desktop connection" program.
To create a new connection by using Remote Desktop connection, please follow these steps:
1. Click Start and then point to All Programs -> Accessories, and then click Remote Desktop Connection. If you are using an older Windows version you should browse an additional folder in Accessories, named Communications, in order to find the program.

2. In the Remote Desktop Connection dialog box, in the Computer box, type the name or IP address or the domain of your server

3. Click Connect
4. In the Log On to Windows dialog box, type your user name, password, and domain (if required), and then click OK.

5. Manage the server, as you would have done, if it was your local machine.
6. Once you are ready, you can disconnect by using one of the two options:
- Log out - you can logout from the server, the same way you will do it on a local Windows PC. The Remote Desktop program will be automatically closed once the connection is broken. The server will continue to operate, and only programs that you have started in the current session will be stopped
- Disconnect - if you choose to only disconnect, the remote connection will be broken, but all programs started during the session will continue to operate. The next time you establish a connection to this server, you will find its desktop as you have left it.
There are various options of the program. If you are interested, more details are available on this page.